
Last updated - August 26, 2026
Positive phishing is about more than just sending out simulated phishing emails; it's about creating a culture of security awareness and collaboration in schools.
When staff feel supported and educated rather than penalised, they are more likely to engage actively in cybersecurity efforts, making the school safer.
To get started, you'll need to sign in with your Microsoft Admin account.
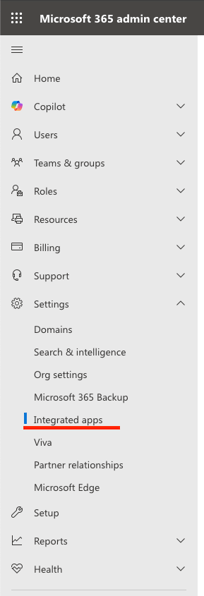
1. Open your Microsoft 365 admin centre and go to Integrated apps under settings.
2. On the integrated apps menu, select Upload custom apps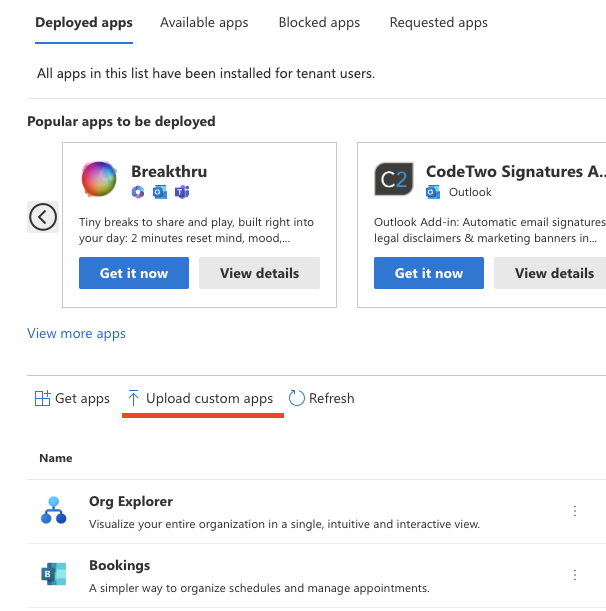
3. When the menu pops up:
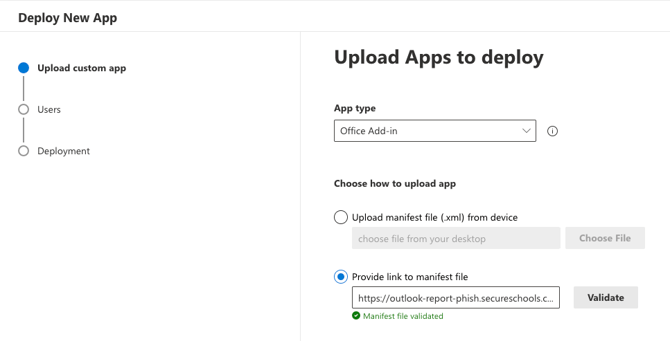
i) For App type, select Office Add-in
ii) Then choose Provide link to manifest file. Add this address: https://outlook-report-phish.secureschools.com/manifest.xml and select Validate
iii) When you see the Manifest file validated message, click Next
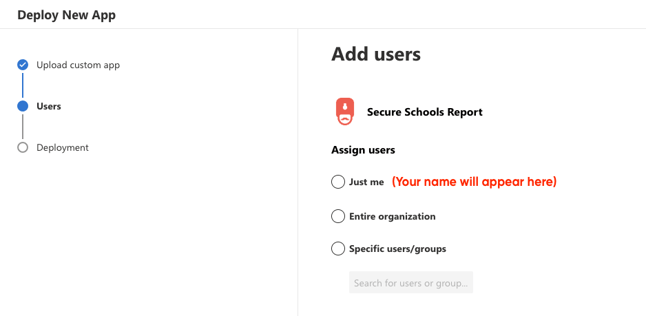
4. Assign the users who should have access to the Report Phishing button in Outlook and click Next
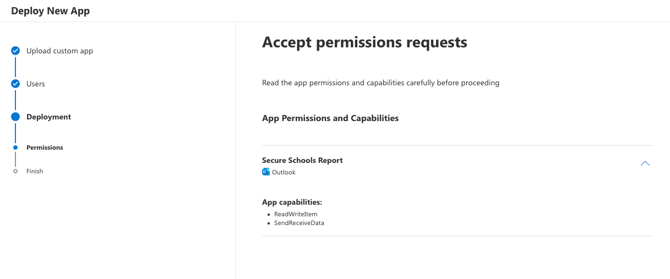
5. Review the permissions that Secure Schools requires, then click Next. On the following screen, click Finish deployment.
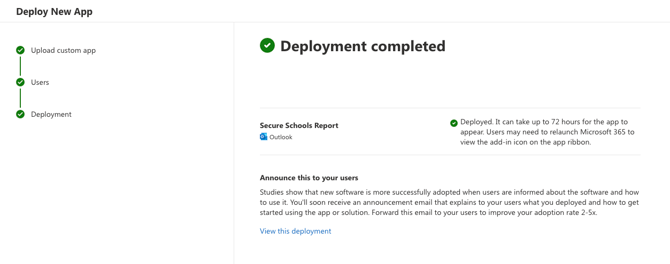
6. As noted below, it may take up to 72 hours for the add-in to appear in Outlook for your assigned users. If users do not see the button after 72 hours, ask them to restart Outlook.
Beginning in August 2026, there is an additional step to configure in your Secure Schools settings to ensure that all reported phishing emails reach the appropriate recipient.
Configuring Microsoft add-ins
1. After signing into your Secure Schools account using an Admin or Owner account, you should go to the Account settings option under Settings: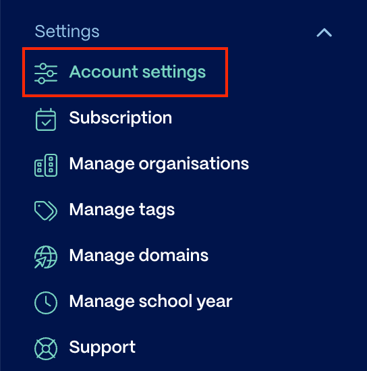
2. Scroll down to the Microsoft add-ins section, and you should see a list of all organisations you've connected to the platform, along with their current status.
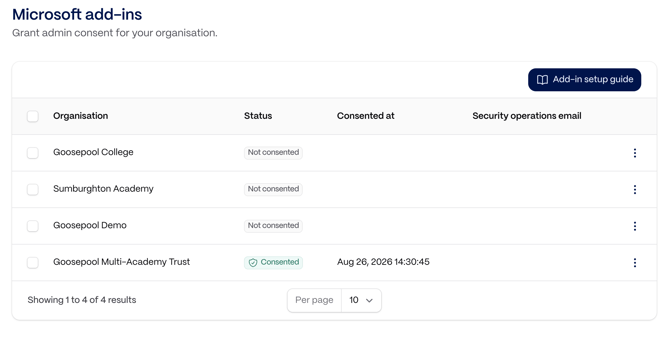
3. When configuring an organisation, under the overflow menu (⋮), you'll find two options: Consent and Mark as consented. This relates to the limitation that consent for the same tenancy may be provided only once.
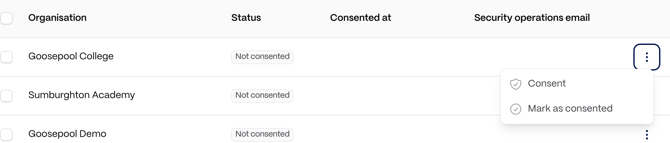
For the first organisation under your tenancy, you'll select Consent and walk through the Microsoft approval process.
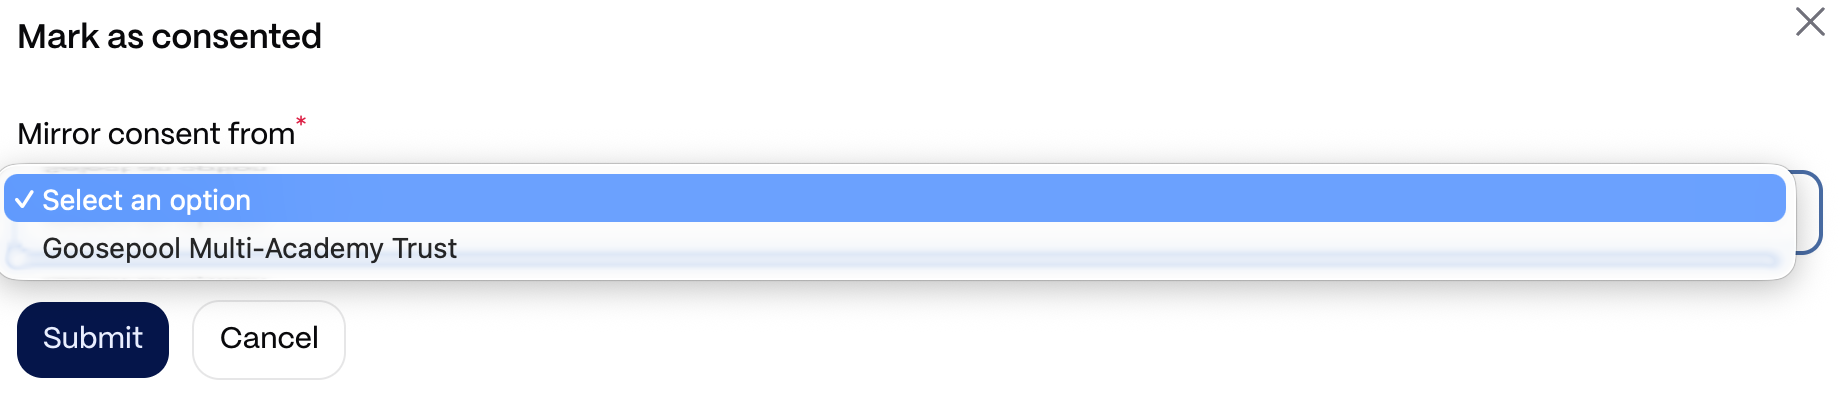
For any subsequent organisations using the same tenancy, you can use Mark as consented, which will prompt you to select which existing organisation this should mirror:
4. Finally, to ensure that the phishing reports reach their intended destination, you should ensure that each organisation has the appropriate email address configured, too. When consent has been completed, under the overflow menu (⋮) you'll now find additional options including Edit Secops email

5. Select Edit Secops email and input the correct email address used by your organisation to manage any potential phishing emails. Please note that this address will receive any emails reported by your staff, so this mailbox should be configured appropriately. Microsoft has more guidance on that here.